


Spray Booth Air Filter how to identify saturation status
Identifying Spray Booth Air Filter saturation status accurately helps teams avoid two common, costly mistakes: replacing filters far too early and wasting usable service life, or running filters long past their functional limit and ruining booth airflow and finish quality. Many teams rely on rough guesswork or arbitrary replacement schedules, which never account for real-world variations in workload, coating type, and daily operating conditions. These practical, field-verified methods let you judge actual filter condition reliably, using tools and observations that are already accessible in almost every spray booth workshop.
Use differential pressure readings as the primary objective reference
Differential pressure across the full filter bank is the most consistent, measurable indicator of actual filter saturation, and it removes almost all subjective guesswork from the assessment process. You measure the pressure of incoming air before the filter, and the pressure of filtered air after the filter, then compare the two values to get a clear number that directly reflects how much airflow resistance has built up inside the Filter Media. As contaminants fill up the empty pore spaces in the filter, this pressure difference rises steadily, in direct proportion to how close the filter is to full saturation.
Take readings only when the spray booth is running at its normal full operating speed, with all doors closed, all dampers set to their regular working position, and no external vents or auxiliary fans pulling extra air through the system. If you take readings when the booth is idling, or when airflow conditions are abnormal, you will get misleading numbers that do not reflect real working saturation levels. Consistency in measurement conditions is far more important than the precision of the tool itself.
Track the trend of pressure change over time, not just the single current reading. A filter that shows a sudden sharp jump in differential pressure after a single heavy painting batch is reaching saturation much faster than a filter that climbs slowly and steadily over weeks of normal use. Watching this trend lets you spot when saturation is approaching, long before the filter hits its absolute maximum resistance limit.
Perform direct visual inspection across all filter layers
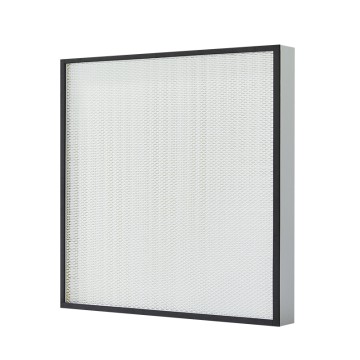
Open the filter access panel and do a full visual check of every filter layer, not just the outermost one that is easiest to reach. Start with the first intake filter that faces the raw incoming air, and work your way through every subsequent stage all the way to the final high-efficiency layer. This full walkthrough lets you spot uneven saturation, where one small section of the filter is completely caked with dried overspray and dust, even if most of the rest of the filter still looks relatively clean.
Check for subtle visual signs that go beyond obvious surface dirt. A filter that is approaching full saturation will look darker, more opaque, and completely filled in across its entire surface, with almost no visible gaps or light-colored empty fiber areas left exposed. If you hold a bright work light up to the outside of the filter housing, very little light will pass through a fully saturated filter, while a new or lightly used filter will let a noticeable amount of light shine through the media.
Look for uneven discoloration or heavy staining in specific zones of the filter face. These dark, heavily stained patches usually line up with areas where overspray drift is consistently heaviest, or where intake air pulls in extra dust from a nearby workshop doorway. These localized spots will hit full saturation long before the rest of the filter, and they can create uneven airflow that ruins finish quality, even if the rest of the filter still has plenty of usable service life left.
Correlate saturation status with real booth performance changes
Notice subtle shifts in booth airflow behavior that show up in your daily painting workflow, long before differential pressure readings hit their maximum limit. If you start feeling noticeably weaker air flow at the spray booth face, if overspray that used to get pulled away quickly now lingers in the air around the part, or if loose paint dust starts settling on freshly wet coated surfaces for no obvious reason, these are all clear practical signs that filters are approaching saturation and airflow can no longer keep up with normal operating demands.
Track changes in your finished coating quality as a secondary real-world check. If you start seeing tiny random dust specks embedded in your wet finish, or if the edge of your spray pattern starts behaving differently than it did a week earlier, this can signal that filters are no longer capturing fine airborne particles properly, or that saturated media is starting to release trapped contaminants back into the booth airflow. These small, persistent finish issues that you cannot trace back to coating material or spray technique problems are very often tied directly to filter saturation.
Watch for unexpected shifts in your booth fan’s power draw or operating noise. As filters get more saturated and airflow resistance rises, the fan has to work harder to push the same volume of air through the system. You will notice the motor drawing more power, running slightly louder, or even humming under extra strain that was not present when the filters were new. This is a clear physical sign that the filter’s resistance is now high enough to put extra load on the entire air movement system, and saturation is no longer just a filter issue — it is starting to affect the full booth’s operating health.
Cross-verify with recent production load context
Factor in the type of work your workshop has been running over the past several days, when you judge how close filters are to saturation. A few consecutive days of high-volume coating work that generates massive amounts of wet overspray will push filters to full saturation far faster than a full week of light, low-overspray touch-up work. If you just finished running a large, messy production batch, your filters are almost certainly far closer to saturation than your standard replacement schedule would predict.
Check the condition of any pre-filters or overspray arrestor layers that sit before the main filter bank. If these pre-layers are already completely full and saturated, they are no longer capturing the heavy wet overspray they are designed to catch. That means all that extra contaminant load is now being dumped directly onto the main filter layers, pushing them to saturation much faster than normal. You cannot judge the main filter’s saturation status in isolation, without checking the state of these upstream supporting layers.
Document every observation, pressure reading, and saturation check note in a shared log that ties back to specific production batches. Over time, this log will help you build a clear, practical reference that shows exactly what saturation looks like for your specific workshop, your unique mix of coating materials, and your typical daily production volume. This makes every future saturation assessment faster, more accurate, and completely tailored to how your spray booth actually operates on the workshop floor.