

Spray Booth Air Filter airflow restriction troubleshooting
Initial on-site airflow anomaly confirmation
Before opening any access panel or replacing any component, start by verifying the real operational state of the spray booth to avoid unnecessary disassembly work. Check the differential pressure readings across the filter bank at multiple stable operating points, and cross-reference these values against the baseline data recorded right after the last full filter service. Walk around the entire booth perimeter to listen for unusual air leak sounds around door seals, panel gaps and duct joints, and confirm that all access doors are fully latched and sealed in their correct operating positions.
Many apparent airflow restriction issues are first triggered by unexpected external conditions that have nothing to do with filter clogging. Confirm the booth’s exhaust and intake fans are running at their designated full speed, and rule out temporary environmental factors that might create misleading pressure readings before moving on to deeper diagnostic steps.
Filter bank root cause inspection and assessment
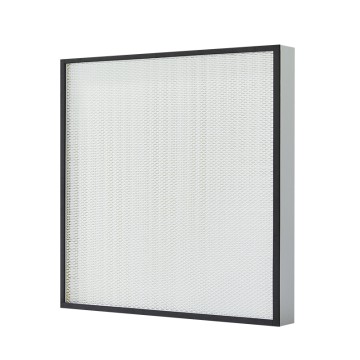
Once you have confirmed a real airflow restriction exists, move directly to the filter bank as the most common source of the problem. Remove the access panels covering the intake and exhaust filter stages one at a time, and inspect the surface loading condition of every filter layer in sequence. Check for uneven overspray buildup that only clogs one side of the filter bank, which usually indicates unbalanced airflow distribution across the booth plenum rather than uniform normal filter aging.
Look for partial blockages caused by accumulated paint overspray that has caked into a dense impermeable layer on the filter face, or debris that has been pulled into the Filter Media after breaking loose from upstream duct walls. Check for any physical deformation, collapse or bypass gap in the filter media that could alter the intended airflow path, and confirm no filter element has shifted out of its seating frame to create unintended unfiltered air leakage.
Duct and airflow path extended diagnostic checks
If full filter inspection confirms the filter media is not sufficiently loaded to explain the measured pressure drop, extend your troubleshooting work along the full airflow path upstream and downstream of the filter bank. Check the inner walls of the connected ductwork for accumulated overspray residue that has built up over long operating cycles, gradually narrowing the effective cross-sectional area and creating unexpected flow resistance. Inspect all dampers and airflow control vanes along the path to confirm they have not shifted from their normal operating positions, and no linkage failure has left a damper partially closed without triggering any system alert.
Check for collapsed duct sections, debris blockages or ice buildup in cold weather operation that can completely or partially obstruct the airflow path far away from the filter bank. Even a relatively small blockage in a long duct run can create enough backpressure to trigger the same airflow restriction alarms that most operators associate exclusively with clogged filters.
Post-repair airflow performance validation
After addressing the root cause of the restriction, do not simply close the booth up and return directly to production. Run the booth at full operating speed for an extended period, and record new differential pressure readings across every filter stage and key duct segment. Compare these new values against the original system commissioning baseline to confirm the airflow restriction has been fully eliminated, and no hidden residual blockage remains somewhere in the system.
Verify that the airflow pattern inside the booth returns to its intended stable state, with no unexpected dead zones or turbulent areas that could compromise finished paint quality. This final validation step confirms the troubleshooting work was fully effective, and prevents the same airflow problem from reappearing after only a short period of normal operation.